How to Connect a Canon PIXMA Printer to WiFi
A WiFi-capable Canon PIXMA printer can connect to a wireless router using one of several supported setup methods. The exact buttons, menus, and connection options vary by PIXMA model, so start by identifying your printer and then choose the wireless setup method it supports.
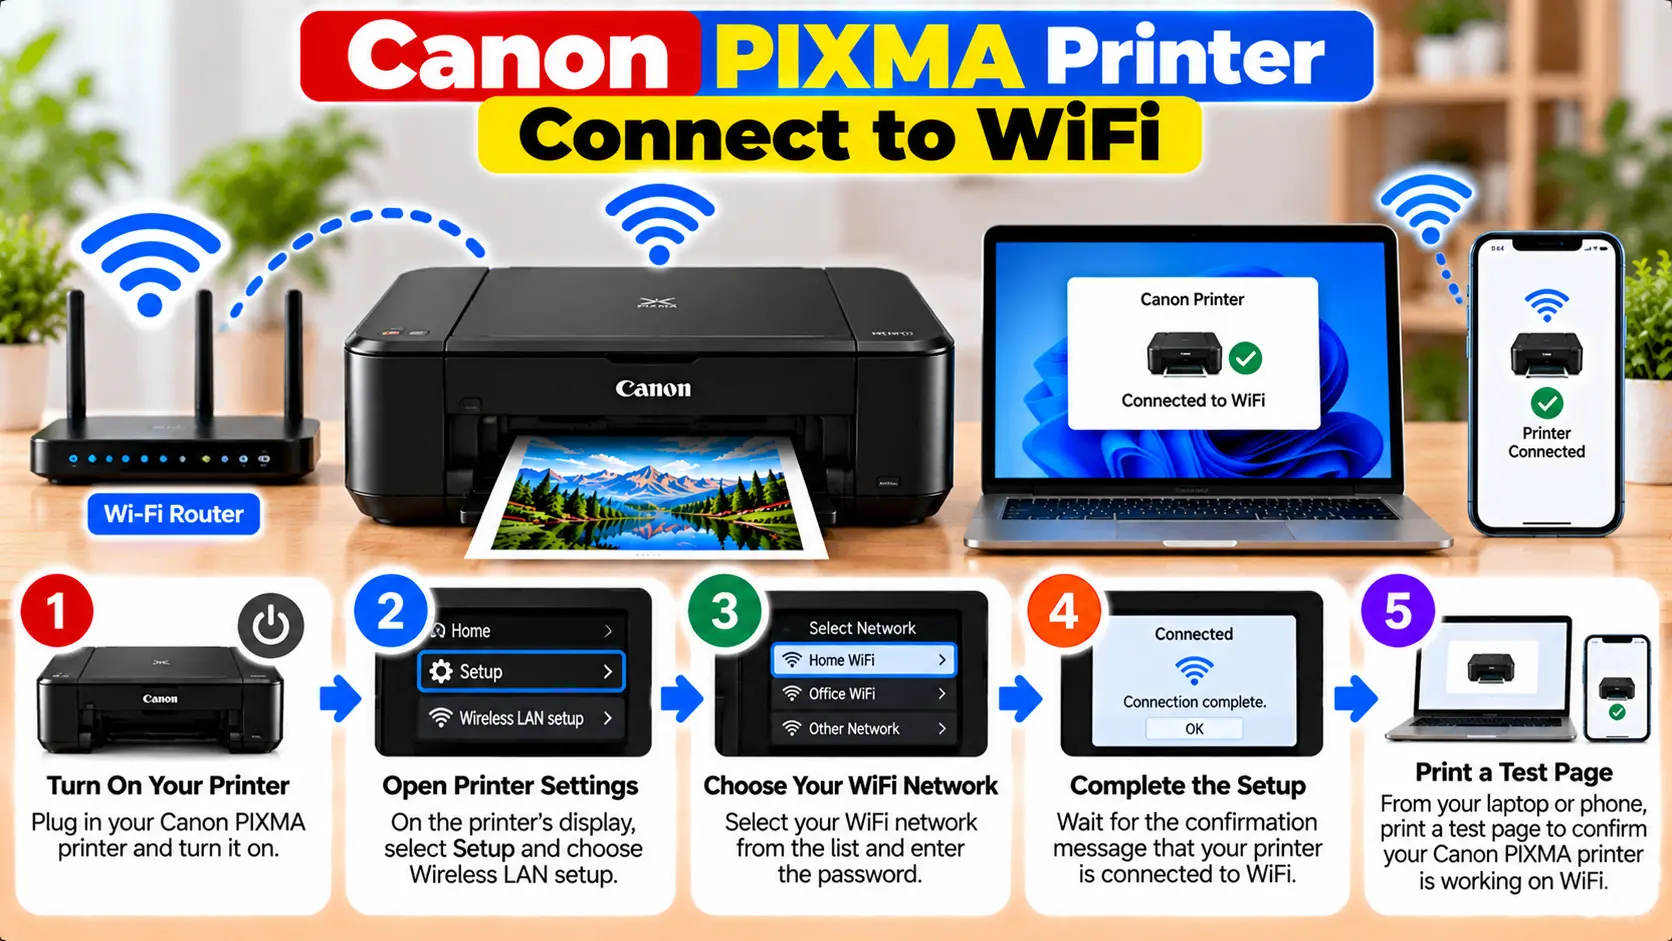
How Do I Connect My Canon PIXMA Printer to WiFi?
First confirm that your PIXMA model supports wireless LAN. Turn on the printer and router, then use a wireless setup method supported by your model, such as Easy Wireless Connect, Manual Connect, or WPS. Enter or transfer the router information as required, complete setup on your computer or mobile device, and verify that the printer is connected to the intended network.
Before Connecting a Canon PIXMA Printer to WiFi
Do not start by pressing random wireless buttons. PIXMA printers use different control panels and wireless procedures depending on the model.
Before setup, check the following:
- Confirm the exact PIXMA model number.
- Verify that the model actually supports WiFi.
- Make sure the printer is powered on.
- Wait for cleaning, alignment, or other printer operations to finish before starting setup.
- Make sure the wireless router is working.
- Know the correct WiFi network name or SSID.
- Have the WiFi password available if the setup method requires it.
- Keep the computer or mobile device available if the selected setup method uses one.
Canon PIXMA Wireless Setup Methods
Depending on the model, Canon PIXMA printers may offer one or more wireless connection methods.
| Setup Method | How It Works |
|---|---|
| Easy Wireless Connect | Router information is transferred to the printer with help from a compatible computer, smartphone, or tablet setup process. |
| Manual Connect | On supported models, select the wireless router from the printer and enter the network credentials. |
| WPS Push Button | Connects through a compatible router's WPS function without manually entering the normal WiFi password on the printer. |
| WPS PIN | Uses a WPS PIN and the router's configuration interface when both devices support this method. |
The presence of one method does not mean every other method is available on that printer.
Method 1: Canon PIXMA Easy Wireless Connect
Easy Wireless Connect is available on various PIXMA models. It allows router information to be registered to the printer through a compatible computer or mobile-device setup process.
Step 1: Turn On the Printer
Make sure the printer is on and has finished any active cleaning, alignment, or maintenance process.
Step 2: Start Wireless Setup
Use the printer's control panel or wireless controls to enter the wireless setup mode specified for your exact PIXMA model.
On models with a display, this may involve opening LAN or Wi-Fi settings and selecting Easy Wireless Connect or Easy WL Connect.
Models without a touchscreen may use a particular button sequence instead.
Step 3: Continue on the Computer or Phone
Once the printer is prepared for Easy Wireless Connect, continue the setup process on the compatible computer, smartphone, or tablet.
Step 4: Select the Intended Network
Follow the setup prompts and provide the wireless network information requested for your router.
Step 5: Complete the Connection
Allow setup to finish before closing the application or switching off the printer.
Afterward, confirm that the printer is connected to the intended router rather than remaining in a temporary setup state.
Method 2: Connect Canon PIXMA to WiFi Manually
PIXMA models with suitable controls may allow you to select the wireless router directly from the printer.
Step 1: Open WiFi or LAN Settings
From the printer's control panel, open the network, LAN, or WiFi setup menu available on your model.
Step 2: Select Manual Connect
Choose the manual wireless connection option when it is available.
Step 3: Select Your Router
Allow the printer to search for nearby wireless networks and select the correct SSID.
Be careful when nearby routers have similar names.
Step 4: Enter the WiFi Password
Enter the network password carefully. Wireless passwords are case-sensitive, so uppercase and lowercase characters must be entered correctly.
Step 5: Confirm the Connection
Finish the on-screen procedure and verify that the printer reports a successful network connection.
Method 3: Connect Canon PIXMA Using WPS
Some PIXMA printers and wireless routers support Wi-Fi Protected Setup. Canon documentation for supported models may provide a WPS push-button method or WPS PIN method.
WPS Push Button Method
Put the printer into its documented WPS connection mode and then activate WPS on the wireless router as instructed by the printer and router documentation.
Complete the process within the time window shown for your equipment and wait for the printer to confirm the connection.
WPS PIN Method
On models that support WPS PIN setup, obtain the printer's WPS PIN and enter it through the wireless router's configuration interface as required.
How to Connect a Canon PIXMA Printer to a Computer After WiFi Setup
Connecting the printer to the router and adding it to a computer are related but separate steps.
After the PIXMA is connected to your wireless network:
- Connect the computer to the intended network.
- Install the appropriate Canon software or driver when your model and operating system require it.
- Use the operating system's printer setup controls or Canon's setup process to add the network printer.
- Select the network version of the printer if more than one copy appears.
- Print a test document.
If the printer is connected to WiFi but the computer cannot find it, troubleshoot discovery separately rather than repeating the router setup immediately.
How to Connect a Canon PIXMA Printer to a Phone
Compatible PIXMA models can also be used with supported mobile printing methods.
For normal router-based printing, connect the printer to the wireless router and make sure the phone is connected to the appropriate local network.
Then complete any model-specific mobile setup required for the printing method or application you intend to use.
Canon PIXMA Printer Won't Connect to WiFi
If setup fails, identify where the connection is breaking instead of repeatedly restarting the entire process.
Printer Cannot Find the WiFi Network
Check that the router is operating and that the wireless network settings are compatible with your exact PIXMA model.
Also verify that you are not trying to use a wireless band or configuration that the printer does not support.
WiFi Password Is Rejected
Re-enter the password carefully. Check uppercase and lowercase letters, numbers, and special characters.
Make sure you are entering the WiFi password and not a router administration password.
Printer Connected but Computer Cannot Find It
Confirm that the computer and printer are using the intended local network. Network isolation or certain router security settings can prevent devices on the same router from communicating.
Printer Stopped Working After Router Replacement
A new router may use a different network name, password, or wireless configuration. In that situation, reconnect the printer using the new router information.
Printer Connects to the Wrong Network
Homes and offices may have multiple SSIDs, extenders, guest networks, or mesh nodes. Verify the network information reported by the printer and make sure it matches the network you intend to use.
Wireless Setup Works but Printing Does Not
If the printer has successfully joined the network, the remaining issue may involve the computer's printer installation, driver, print queue, or printer selection rather than WiFi itself.
Common Canon PIXMA WiFi Setup Problems
| Problem | What to Check |
|---|---|
| Network not listed | Router status, printer wireless compatibility, SSID visibility, signal, and model-specific network requirements. |
| Password rejected | Correct SSID, correct WiFi password, capitalization, and character entry. |
| WPS does not work | Confirm both the router and exact PIXMA model support the selected WPS method. |
| Printer is connected but not found | Computer network, device isolation, installed printer entry, and required software. |
| Problem started after new router | Reconfigure the printer with the new router's SSID, password, and compatible wireless settings. |
Common WiFi Setup Mistakes to Avoid
- Following instructions for a different PIXMA model.
- Assuming every PIXMA printer has WiFi.
- Assuming every PIXMA model supports WPS.
- Entering the router administration password instead of the WiFi password.
- Confusing Wireless Direct with router-based WiFi.
- Repeating wireless setup when the actual problem is the computer's printer installation.
- Using unknown third-party software presented as a required Canon setup utility.
Related Canon PIXMA Guides
Frequently Asked Questions
How do I connect my Canon PIXMA printer to WiFi?
Identify your exact PIXMA model and use a wireless setup method it supports. Depending on the model, this may include Easy Wireless Connect, Manual Connect, WPS Push Button, or WPS PIN setup.
Do all Canon PIXMA printers connect to WiFi?
No. PIXMA is a large printer family, and connectivity varies by model. Confirm the specifications of your exact printer before attempting wireless setup.
Can I connect a Canon PIXMA printer using WPS?
Some PIXMA models support WPS Push Button or WPS PIN setup. The router must also support the corresponding WPS method.
Why can't my Canon PIXMA find my WiFi?
Possible causes include an incompatible wireless configuration, incorrect setup mode, weak signal, hidden or unexpected SSID, or router settings that do not match the printer's capabilities.
Why is my Canon PIXMA connected to WiFi but not printing?
Once the printer is successfully connected to the router, a separate problem may exist with the computer's printer installation, driver, print queue, device discovery, or selected printer.
Is Wireless Direct the same as connecting my PIXMA to my router?
No. Wireless Direct allows a compatible device to communicate directly with the printer, while normal WiFi setup connects the printer through a wireless router.
Final Canon PIXMA WiFi Setup Checklist
- Exact PIXMA model identified.
- WiFi capability confirmed.
- Printer and router are powered on.
- Correct wireless setup method selected.
- Correct SSID selected.
- WiFi password entered correctly when required.
- Printer reports a successful connection.
- Computer or phone is using the intended local network for router-based printing.
- Printer is added to the computer or mobile printing workflow.
- Test print completed successfully.